

Today we’re making a DIY maze! Kids of all ages will have so much fun making their own DIY mazes, but also trying to get the marble through them. This is a fun craft and a fun STEM activity that can benefit both younger children and older children. Plus, all of it stays in a baggie so you don’t have to worry about losing the marble. Make this DIY maze at home or in the classroom.
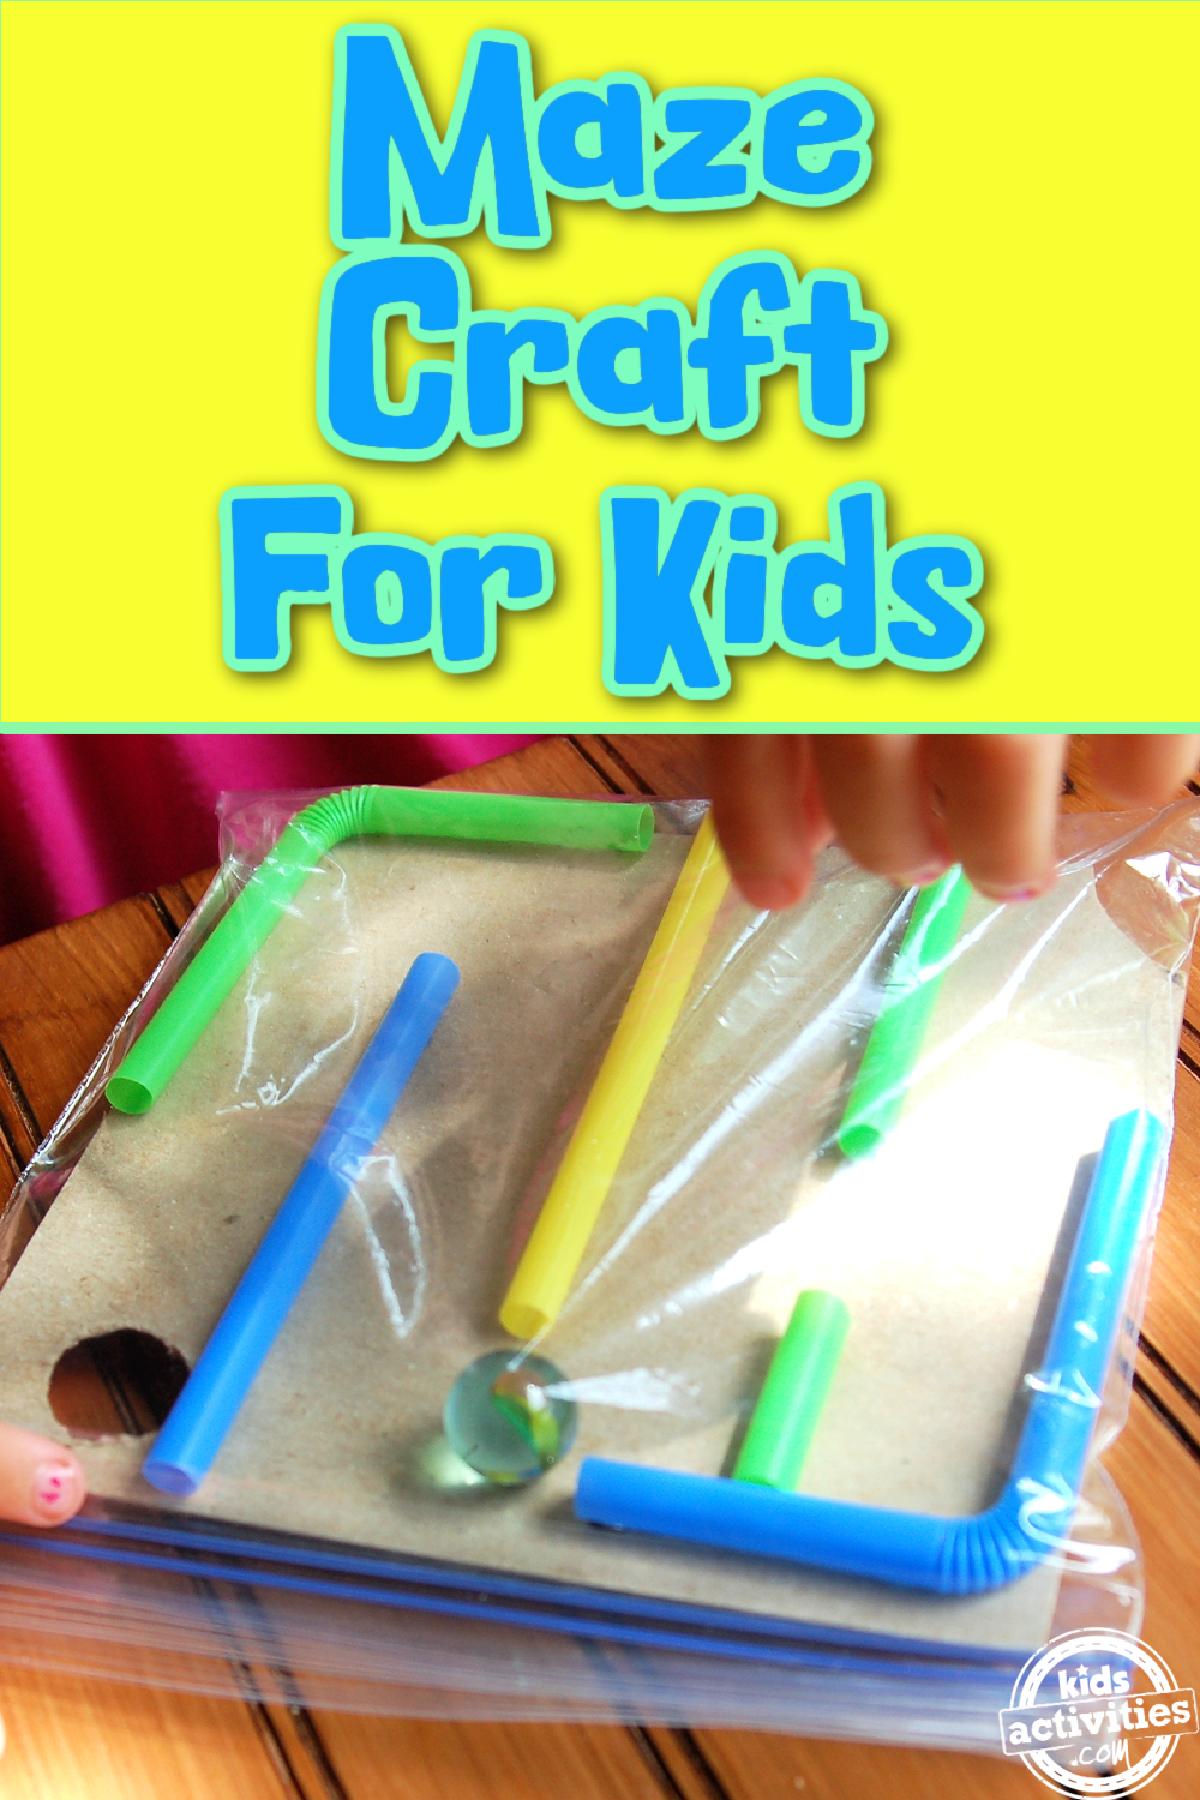
DIY Maze For Kids
We are doing a STEM activity today. This craft is not only fun, but educational as it works fine motor skills and problem solving skills. And really, young kids and older kids, can both benefit from it.
The best part is, you can also change it up. If your child is little and less advance, make the DIY maze less challenging by using less straws. Is your child older? Then use more straws to make the maze more tedious and challenging. Oh, did I mention this is a budget-friendly craft? Win-win all around! So, without further ado, let’s make DIY mazes!
This post contains affiliate links.
Related: Let’s make a DIY pom pom maze!
Supplies Needed For This Fun and Simple DIY Maze
Step 1

Cut down your straws to various sizes so you can make your maze with dead ends and different turns. Also cut down your cardboard to fit into your sandwich baggie.
Step 2
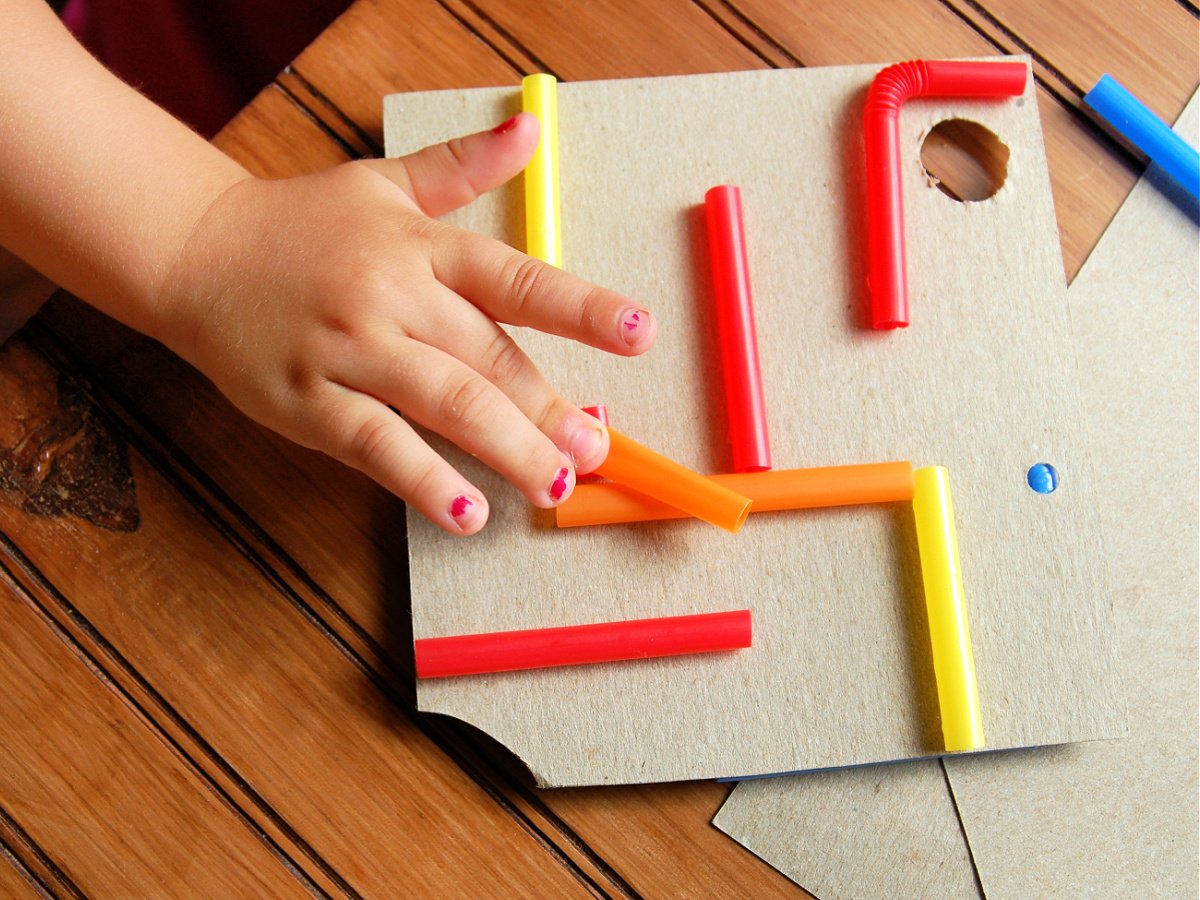
Glue your straws onto your cardboard. Make sure you have an opening, an exit, and a few dead ends to make it challenging. Let it dry.
Craft Notes:
You can also do the same for the back so you have 2 mazes. That’s what we did.
Step 3
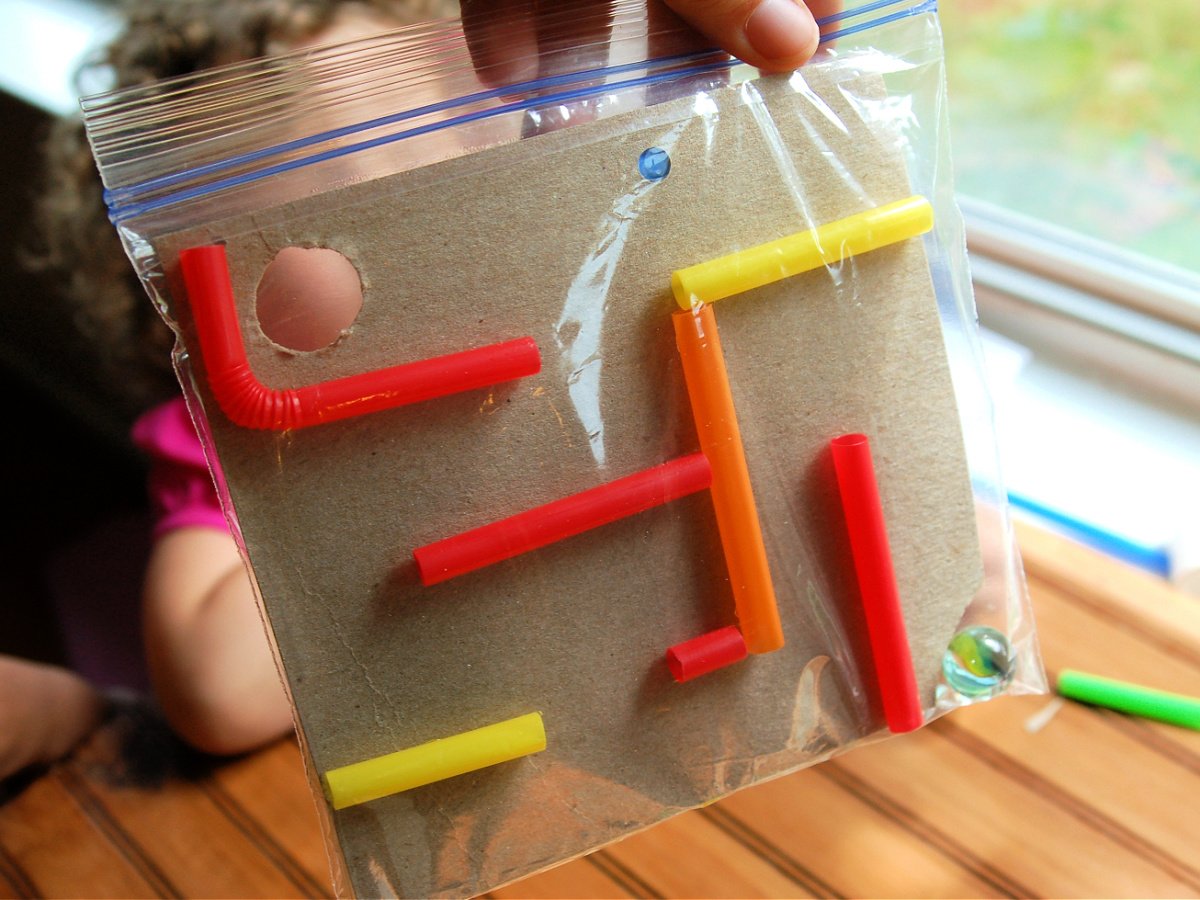
Slip the cardboard and straws into your baggie and then add your marble.
Step 4
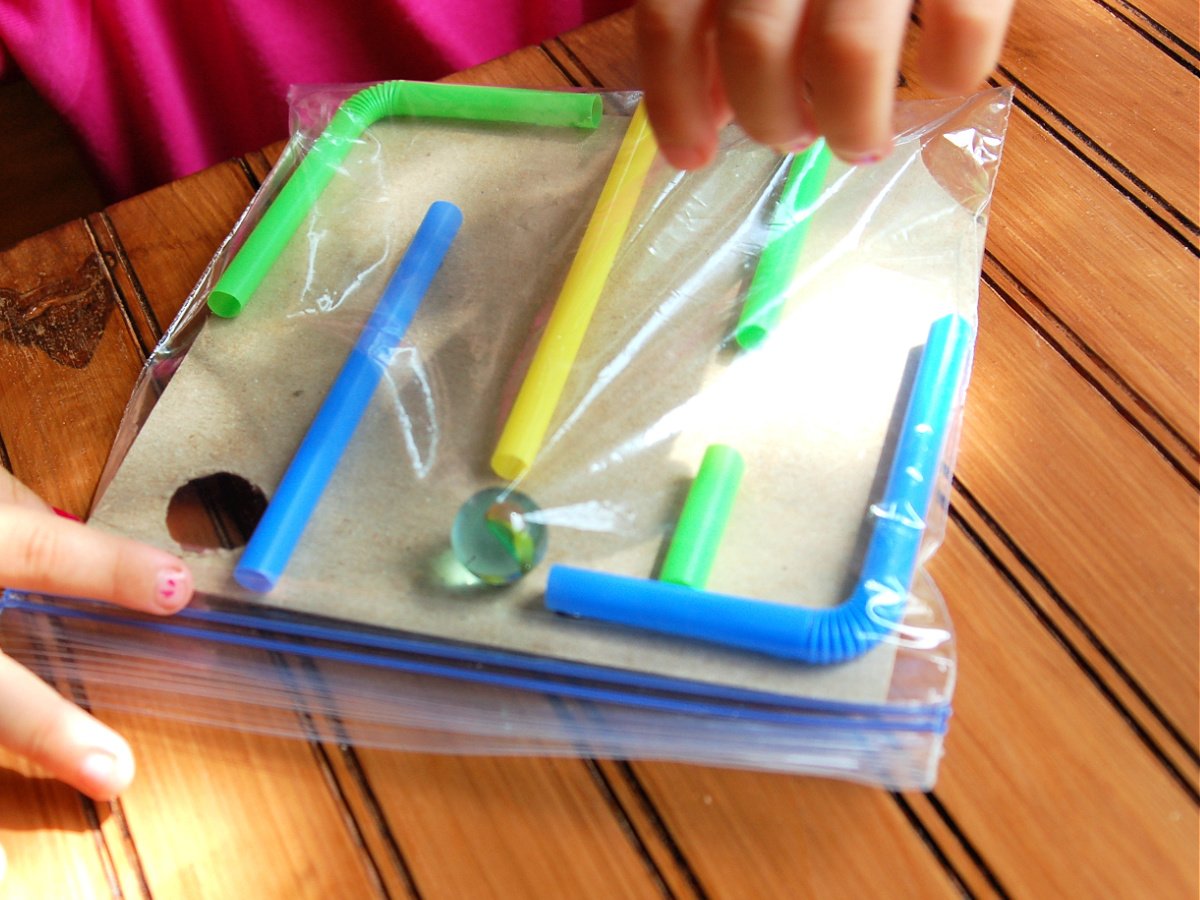
Seal your baggie and play with your DIY maze!
Our Experience With This DIY Maze
My kids and I had so much fun making our mazes. And because we made them double sided, we had twice the fun. I have multiple kids, and so we took turns trying to figure out each others puzzles.
But this craft is so easy to do, you could easily make multiple baggie mazes and switch them out for the most fun and problem solving activities.
And it’s a great way to use up cardboard…and the box of straws I found in the pantry. I really don’t know how long they’ve been in there. But they got used and that’s the important thing! I hope your family has as much as mine did with these DIY mazes.
Materials
- Scissors
- Cardboard
- Straws
- Craft Glue or Hot Glue
- Sandwich Baggie
- Marble
Instructions
- Cut down your straws to various sizes so you can make your maze with dead ends and different turns.
- Also cut down your cardboard to fit into your sandwich baggie.
- Glue your straws onto your cardboard. Make sure you have an opening, an exit, and a few dead ends to make it challenging. Let it dry. You can also do the same for the back so you have 2 mazes. That’s what we did.
- Slip the cardboard and straws into your baggie and then add your marble.
- Seal your baggie and play with your DIY maze!
More Maze Fun From Kids Activities Blog
How did your DIY maze turn out?


